Media files engage large proportion of phone memory. You might want to shift and keep a backup on Mac so that you can play on other device or transfer back to your phone whenever you like. Of course iTunes does the synchronization but it's not a very thoughtful tool. User who wants to keep song details like rating, genre, name, time etc. are advised to use TransPhone.
What's special in
Myjad TransPhone? You are free to transfer songs, videos, podcast, iBook, photos and other media files to Mac, iTunes, new iPhone, iPad and iPod. TransPhone contains strong feature for managing playlist which allows you create, add, edit, transfer and delete. Plus if you are not sure whether the videos that you have downloaded from Internet support iOS or not, TransPhone auto converts videos to high definition iOS-friendly formats.
You are facilitated to use Windows and Mac versions according to your OS. Now let's try TransPhone and transfer music from iPhone to Mac.


How to Transfer Music from iPhone to Mac?
1
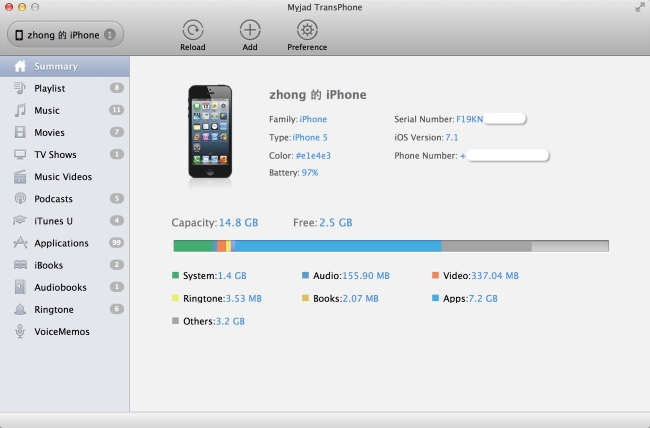
Launch TransPhone on Mac
Install and run TransPhone program on Mac, and you will find that the users interface which is a gray window will pop up automatically, the files like music, videos, TV shows, applications, etc. your iPhone owns on the left column. And the image of iPhone will appear on middle interface.
2
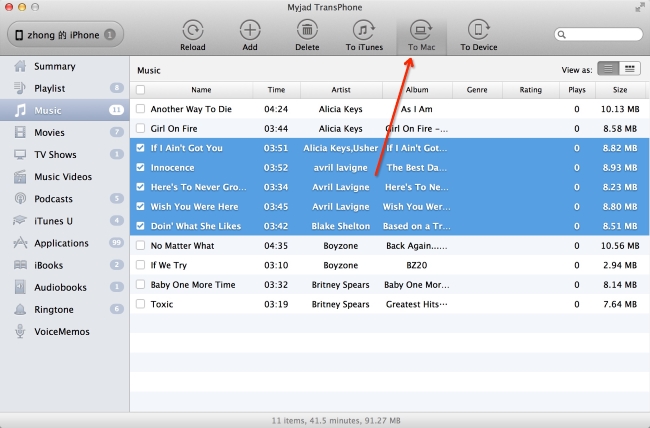
Export iPhone Music to Mac
TransPhone supports you to select songs and transfer them in batches. So first you need to check the information of music you need, then click right to choose which song you want to own on Mac by hitting
"Music" icon on the left list. After confirming the songs, the button of
"To Mac" you on the top margin will lead you to transfer your music from iPhone to Mac.
3
Choose a Storage Path on Mac
A smaller window which covers the main interface will show you all storage places from Mac, and then choose your familiar path to save iPhone music step by step. If you do have a local storage selected on Mac, then go to stroke
"Open" button which is drawn with blue on right lower corner.

4
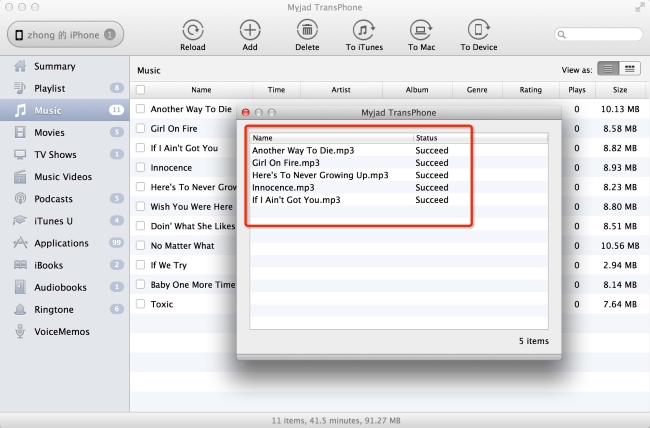
Check iPhone Songs You Transferred
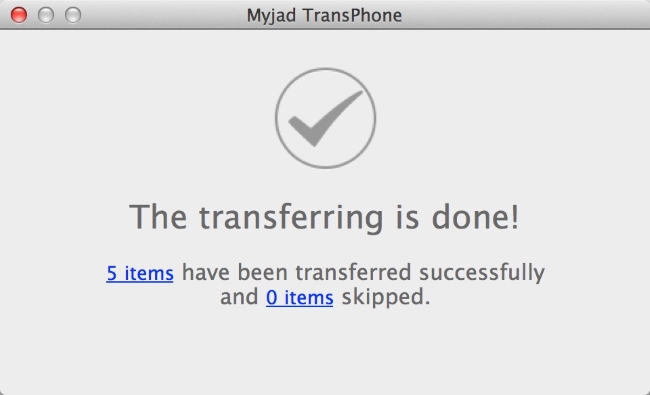
When you transfer iPhone music, the small interface will change into displaying song files you transferred successfully. Confirm the successfully transferred music. If anyone is failure, then go the same way above to transfer the failure songs. Myjad TransPhone will inform you
"The transferring is done" with the number of successful and failure items.
 TransPhone
 is more intelligent and easier to operate than iTunes. If you are about to transfer massive audio and video files from iPhone to Mac folder, don't hesitate to choose TransPhone. It's an awesome program facilitates all data transferring process for
iOS devices.